Getting Skins Into Assetto Corsa Competizione
This is a tutorial on how to get Custom Skins into Assetto Corsa Competizione (ACC) since it's very different compared to any other game.
NOTE: This guide does not cover painting itself. For info on that check out RBDK's skinning guide
Contents
The Basics
You can get the templates from here.
Step 1 - Creating the Team
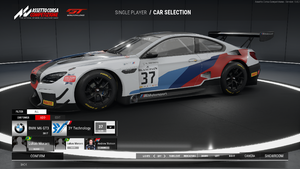
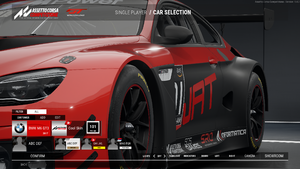
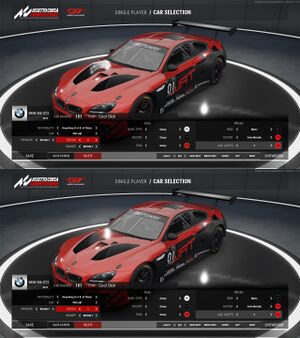
First of all we need the game to create the team for the car. To do this go to the car selection screen and press the ADD button that's highlighted in red (Fig. 1).
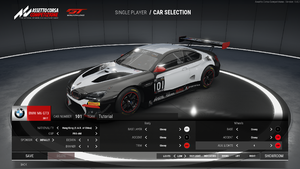
Pick the car you want to paint and it will bring you to the Team Editor screen (Fig. 2).
All you need to do right now is enter a Team Name and hit the save button, though it and everything else you can see on this screen can be edited later if you want.
Step 2 - Creating the folder structure
Once you have saved your team go to [...]\Documents\Assetto Corsa Competizione\Customs\Cars. In this folder should be a .json file with a randomly generated name (Fig. 3).
You can rename this if you want in order to keep things organized when having multiple skins installed.
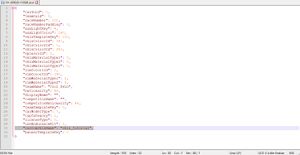
Open up this file with Notepad or a similar program and look for the "customSkinName" line. Between the inverted commas, type in the name you wanna use for your skin's folder(Fig. 4).
I probably shouldn't have to tell you that it needs to be a unique name not used by any other skin but what do I know?
Now, go to [...]\Documents\Assetto Corsa Competizione\Customs\Liveries and create a folder with the same name you just typed into the .json file.
Step 3 - Getting the Skin In-Game
Once you have painted enough and wanna get the car into the game you need to save the skin as decals.png. Yes that's right, a .png file, no messing around with stupid .dds settings.
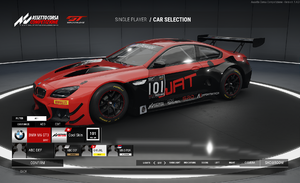
You can now Alt-Tab back into the game and reload the skin by reselecting your Team. You now might notice that a bunch of sponsor decals and the Blancpain Numberplates aren't visible on the Template but are still stamped onto your skin, so some parts of your design might be obscured by that(Fig. 5).
IMPORTANT: If you're painting the Lexus you have to save the file as sponsors.png
NOTE: For the best results, keep the RGB values of your colors in a range between 10 and 237.
Advanced Techniques
Everything mentioned previously is good enough for the majority of custom skins but if you want to make it fancier, this section is for you.
PBR Values
You might have noticed that the game generated a decals.json file. Opening this file shows 4 values that control the gloss and metallicness of your skin. You're free to play around with these values but here are some preset values that the game uses for the simple Livery Editor included in the Team Editor. Copy paste the one you want into the file
| Glossy | Matte | Satin | Satin Metallic | Metallic | Chrome |
| { "baseRoughness": 0, "clearCoat": 1, "clearCoatRoughness": 0, "metallic": 0 } |
{ "baseRoughness": 0.45, "clearCoat": 0.3, "clearCoatRoughness": 0.6, "metallic": 0 } |
{ "baseRoughness": 0.45, "clearCoat": 0.1, "clearCoatRoughness": 0.3, "metallic": 0 } |
{ "baseRoughness": 0.3, "clearCoat": 0.5, "clearCoatRoughness": 0.3, "metallic": 0.7 } |
{ "baseRoughness": 0, "clearCoat": 1, "clearCoatRoughness": 0, "metallic": 0.625 } |
{ "baseRoughness": 0, "clearCoat": 1, "clearCoatRoughness": 0, "metallic": 0.9 } |
Two PBR Regions
NOTE: This doesn't work on the Lexus.
It's possible to split the skin into two files which allows for two different PBR values on the same skin. Using the example skin as seen in Fig. 5, we're going to make the black base paint matte, and the red parts glossy.
To do this, we're gonna hide the layers of the red parts and save it decals.png as usual, and then hide everything but the layers of the red parts and save it as sponsors.png.
Now by editing the decals.json and sponsors.json files we can achieve the desired effect(Fig. 6).
NOTE: You cannot add any more regions than that. Two is the maximum.
Hiding some of the stamped decals
This is more of a glitch than an intended technique. As of version 1.5.9 it still is possible but it could be fixed in the future.
Once your skin is imported go to the Team Editor and change the Design value to 1 (Fig. 7). This will remove some of the stamped decals, but also removes the wheel colors.
The exact effect varies from car to car. On most cars it just hides the Blancpain Numberplate on the hood aswell as the decals on the side skirts and rear wing.
On some cars like the 2019 Bentley Continental, Ferrari 488, and McLaren 650S it also moves the numberplates on the doors.
On the McLaren 720S it removes all of the Numberplates and stamped decals.
